This is a guest post from my colleague Staffan Rydergård.
Export your Azure SQL database
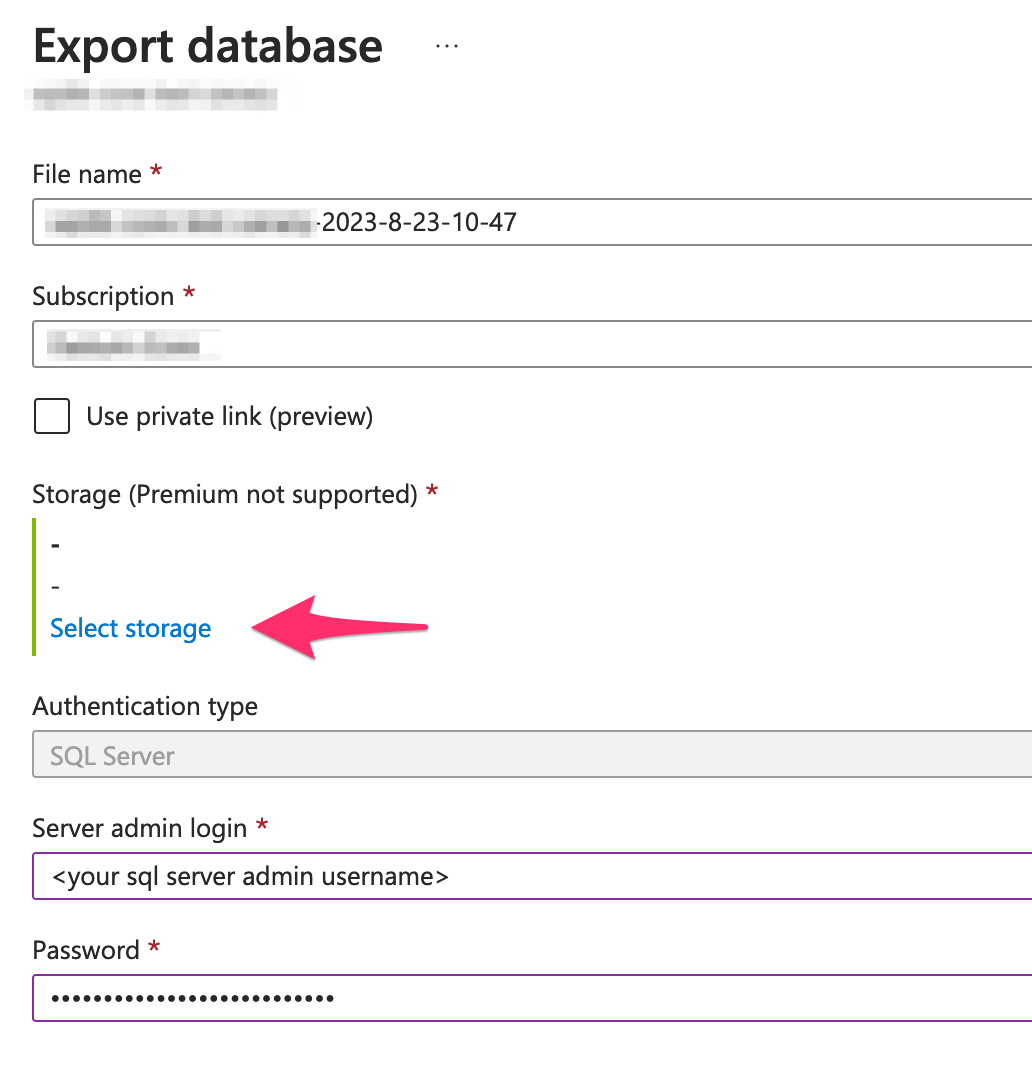
In Azure Portal, navigate to your SQL database and select Overview -> Export

Select an existing Storage account and Container as target location for your exported database.
Fill in your SQL Server credentials and then click on OK. Azure portal will start an export task in the background and notify when the export is done.
Import the database on your local SQL server
Using e.g. Microsoft Azure Storage Explorer connect to your storage account download the newly created .bacpac file from the container you selected earlier.
Open Azure Data Studio and view Extensions. Search for “SQL Server Dacpac” from Microsoft and install the extension.
Connect to your local SQL server and right click on the Databases folder.
Select Data-tier Application Wizard.
In the wizard, select the option “Create a database from a .bacpac file [Import Bacpac]” and select the downloaded .bacpac file and name the target database you would like to create.
Finishing touches
If you are using a dedicated login to access your database from your code then you need to create a user in the imported database for that login. Right click on the imported database and select “New Query”. If your login user name is e.g. “devuser” run the following statements to add the user and assign the db_owner role to that user.
1 | CREATE USER devuser FROM LOGIN devuser; |